What?
In the individual vinyl project I need to design and cut out a minimum of a three color design to be stuck on something like a window or laptop or water bottle. The final can't be more then one square foot. To design it we are using illustrator. Each color has to be a separate file so it can be printed on a different roll of vinyl. After it's printed we have to apply it onto out object using the application tape and the vinyl tool. Below you will find a step by step on how I completed mine.
Idea.
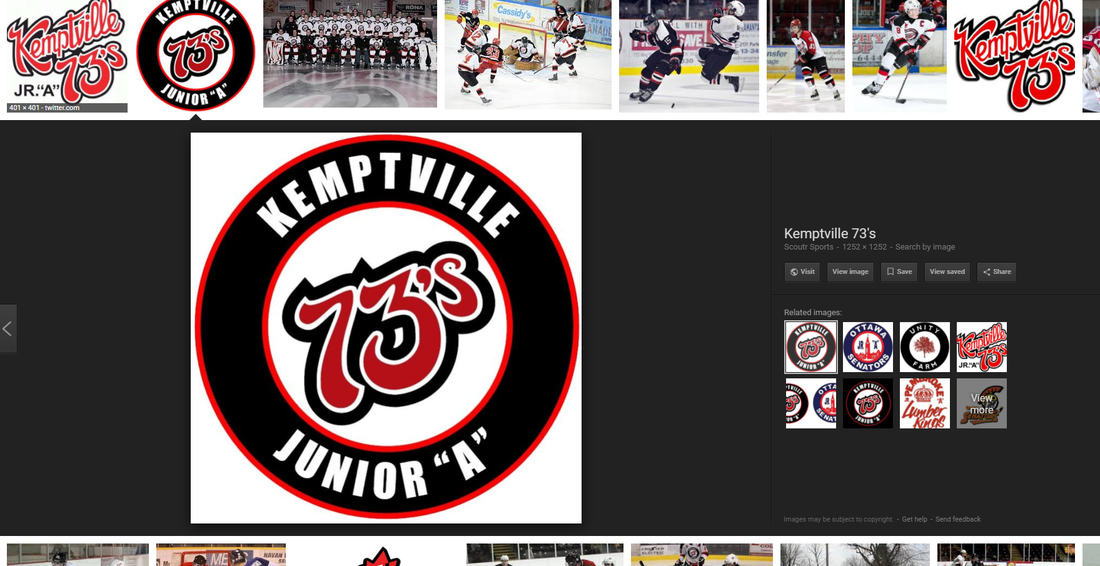
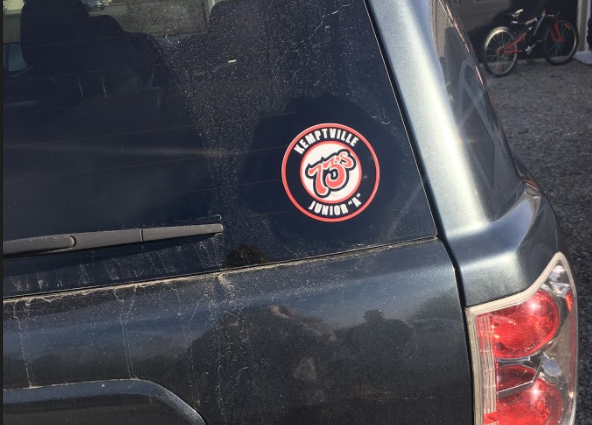
My brother plays for a hockey team in Canada and since I was about to visit him after this project I decided to make him a team logo to stick on the back window of his car. The logo only has three colors and is a simple enough layout for a beginner in illustrator(me) to edit it and get it to cut out on the vinyl machine.
|
I found I nice clear image of the logo online that I knew would convert to a vector file in illustrator pretty easily. I save the picture, placed it in illustrator, and converted it to a vector file.
|
|
|
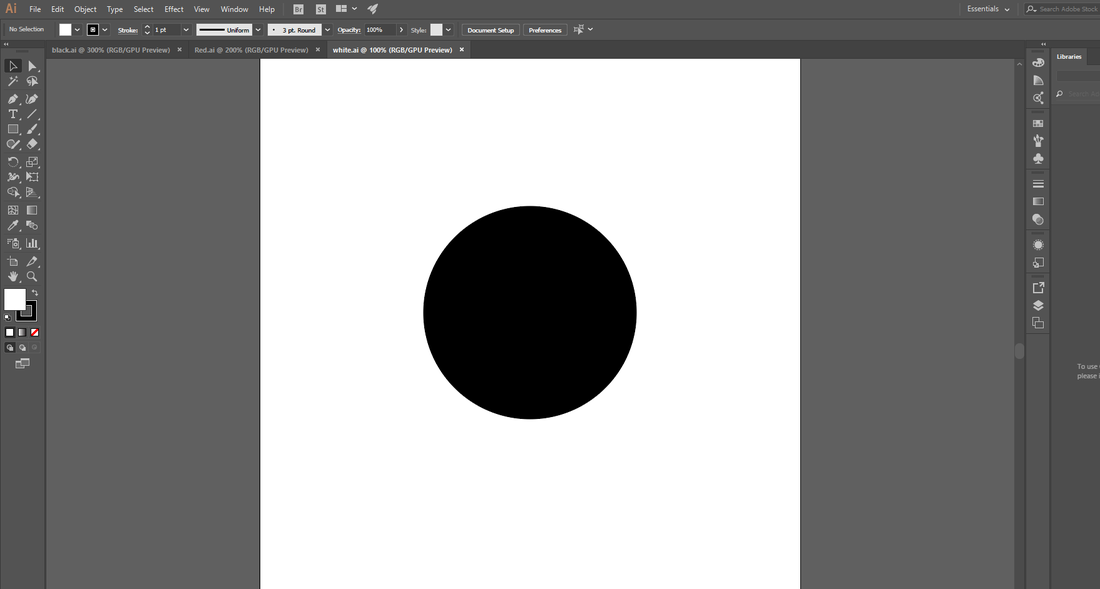
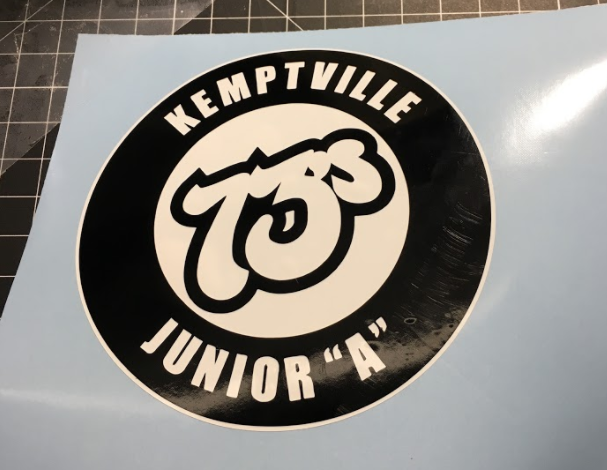
Next I resized the object and placed it on two other new illustrator files so I had three copies that were the same size. I then was able to ungroup and cut pieces out so each layer had what it needed. To the right are the three files ready to cut out. The circle in the white and it will be on the very bottom then on top of that I will place the black with the letters cut out. Then on the very top I will put the numbers and circle outlines in red.
|

|

|
|
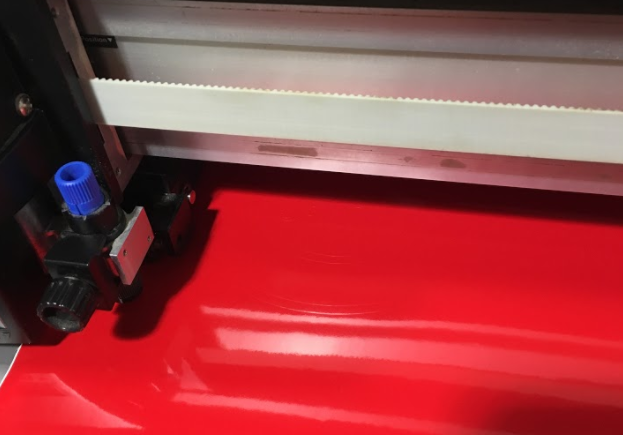
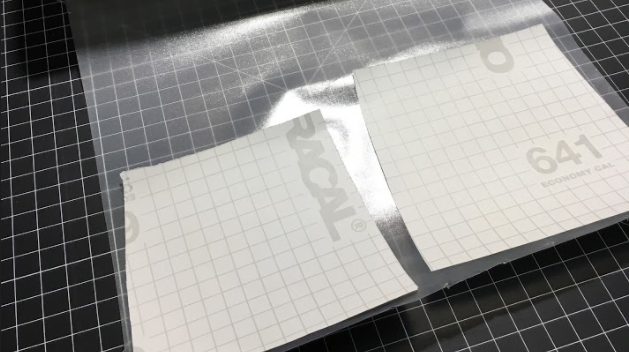
After I had my files I headed down to the vinyl machine and cut away. I used the tools to carefully remove the extra material till I had my three parts to put together.
|
|
|
|
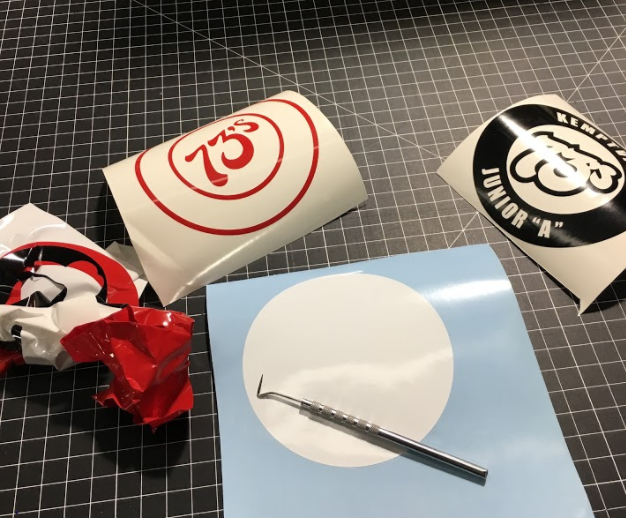
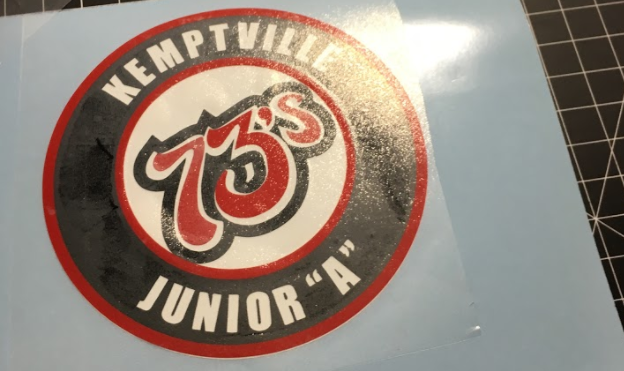
I used application tape to first but the black layer over the white then the red over the black.
|
|
|
|
Then I put application tape over the entire this and brought it to Canada with me and put it on my brothers car.
|
|
|
Summary
In this rotation I learned how to set up the vinyl cutter and cut different designs out. I made a layered design so I learned how to use the application tape to layer the different colors of vinyl and than to put it on the final project. During this I also helped other people in my group make their illustrator file work the way they want it too and how to make sure there isn't wasted vinyl because of extra paths in their file they they don't actually need.
